Originally published at: https://blog.particle.io/2018/08/30/hands-on-with-the-xenon/
This week, I had a chance to take three new Particle Xenon boards for a spin. Our engineering teams are hard at work polishing the firmware, mobile apps, and brand-new Mesh APIs, but I was able to walk through the basic experience of claiming and naming three Xenons, setting up a mesh network of three, and interacting with the devices from the Tinker app.

It was a lot of fun to get my hands dirty with our new hardware, and I wanted to share a few things that I think you’re gonna love about the new devices.
Feather form factor FTW!
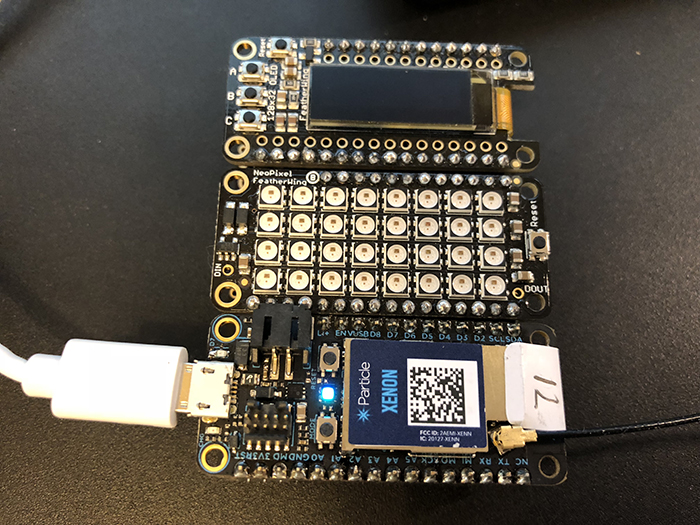
It’s no secret that our new Mesh hardware will adhere to the Adafruit Feather form factor, which makes every Mesh device instantly compatible with the 50+ FeatherWing accessories that Adafruit produces. We’ve known this since Mesh was announced, sure. But unboxing these Xenons for the first time and seeing them IRL drove home for me just how awesome it’s going to be to add our new hardware to this thriving ecosystem. You’ll be able to drop a Xenon, Argon or Boron into a tripler with NeoPixel and OLED wings and take flight with your IoT dreams!
Yes, I just wrote a pun. I have no regrets.
Using Bluetooth to configure devices 🔥
At Particle, we’ve always worked hard to provide the smoothest device onboarding possible. We’ve done a lot in the past to lower the bar on getting a new Wi-Fi (Photon) or Cellular (Electron) solution online. Now that BLE is ubiquitous, we’re excited to introduce this technology as the preferred way to bring a new Particle Mesh device online. I got all three of my Xenons configured via Bluetooth in a matter of minutes, and was impressed by how smoothly it went.
Thanks again to the Herculean efforts by our amazing engineers, Bluetooth-based device configuration is about to get a whole lot easier. Welcome to the IoT connectivity club, Bluetooth.
Using Bluetooth to set up a Particle Mesh network 🔥🔥
But wait, there’s more! Beyond onboarding of new devices, you’ll be able to use Bluetooth to create new Mesh networks, manage device roles (gateways, repeaters, and endpoints), obtain device diagnostics, and more!
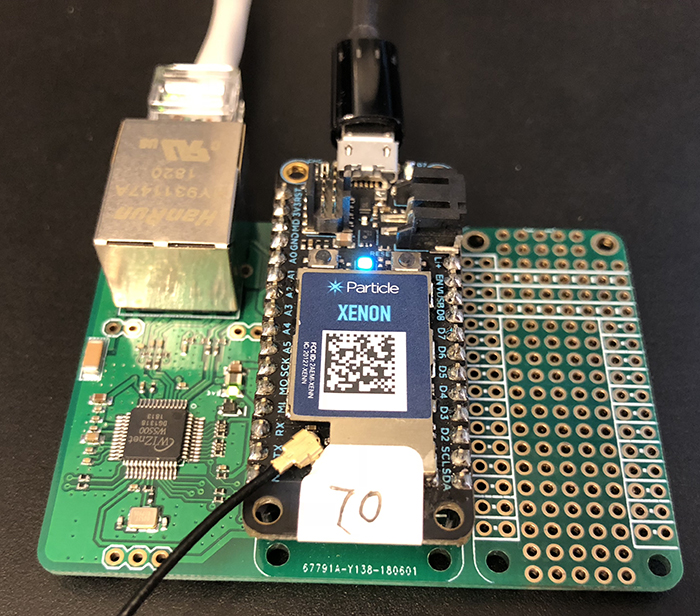
Once I got my first Xenon configured, I dropped it into an Ethernet FeatherWing and set it up as a gateway on a brand-new Mesh network. Then, I joined the other two Xenons to the network and had, as a co-worker pointed out, the largest Mesh network in the state of Texas. Ye haw!
Just as it was with onboarding my Xenons, using Bluetooth to configure the mesh network was painless and took me just a few minutes, start to finish.
Calling cloud functions on an endpoint, through a gateway? 🤯🤯🤯
This last one just might be my favorite.
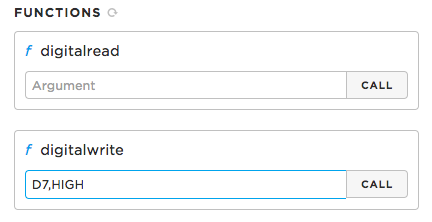
Once I got all of my Xenons claimed and joined to my fancy new Mesh network, I opened up the Particle Console and clicked on one of my endpoint devices. I configured all three Xenons with our Tinker firmware, so I had read and write access on all the digital and analog pins. Just as our Photons and Electrons do today, every Mesh device has a blue LED wired to pin D7. I set D7 to HIGH using the digitalWrite cloud function and clicked the Call button.

The amazing part about all of this is that my Xenon has no direct connection to the internet and thus, the Particle Device Cloud! Behind the scenes, calling that cloud function triggers a magical set of steps whereby the Device Cloud finds my gateway and dispatches a message to my endpoint, which the gateway receives and then forwards on with ease. It sounds both easy and magical because our engineers have made it so.
I’ve been using Particle devices for a long time, but I don’t think I’ve ever had so much fun turning that D7 blue LED on and off again using the console.
I know that many of you are just as excited as I have been to get your hands on our new Particle Mesh devices, and I’m happy to say that I think you’re gonna love them. And, if you’ve not yet preordered your Mesh devices, there’s still time. The preorder store will be open until September 10th, so head on over and reserve your spot in line!


