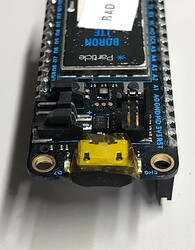
Alright, so I finally had a chance to test the conformal coating process and thought I’d share here my learnings here.
First, I had both the brush on as well as the spray on:
I tried both methods on my host PCB. I initially thought I was going to like the spray on method. The spray on can had lots of warnings regarding requiring adequate ventilation and other warnings that turned me off right from the start. I still thought I’d give it a try in my garage with the main garage door open. I didn’t try it very long however, it seemed to not go on as even as I’d like and it was hard to know where exactly it was going. It also was hard to know how thick it was going on. On a second host PCB, I tried the brush on Conformal coating and like others said, this brushes on similar consistency as nail polish. Overall, I personally liked the bush on better than the spray on. If I had a true spray fume extraction system then maybe I’d go with the spray on but all in all it seemed the brush on worked quite well.
So now… moving on to the Gen 3 Devices:
Method 1: Plug the Boron into a header to attempt to protect the pins and then tape off/plug the USB port. Then liberally apply conformal coating to the top, wait about 5 minutes, flip over and repeat.
Results: First, taping off the USB port and using the little plug thing is a pain. It’s easy to do but cutting the tape that size and dealing with the tiny strip is a pain. Second, I must of been a little too liberal with the Conformal Coating when I was applying it to the top. What ended up happening is the conformal coating leaked into the bare featherwing header and basically got all over the header pins. My guess is it leaked down the side when I was doing the top side. This was not ideal. So between the pain of taping off the USB port and Conformal coating getting in the header pins I figured I need to find a better way.
Method 2: Awhile back I got a PanaVise 350 This turned out to be a great tool for many things and now conformal coating as well. For the top side of the Gen 3 device, I put the Gen3 device vertical with the USB port at the top and just carefully brushed on the conformal coating. Since it’s vertical none of it got on the header pins this time and you can be precise with the placement using the brush so avoiding the USB port was fairly easy. For the back side, this is where the panavise really came in handy. I put the Gen 3 device at a 45 degree angle, started applying at the top of the Gen 3. To get under the “tin” I just put a dab/drop of it on the top side of it until it started coming out the bottom side of the tin. I could then easily rotate the device 360 to flow the conformal coating all on the underside of that tin. Worked pretty slick.
Here’s a quick video. Conformal Coating - Particle Boron - YouTube
Overall, I think method 2 will work well. Maybe I can make up a 3D printed jig to hold 4-5 devices at a time within the PanaVise. It goes quick but the 5-10 minutes handling time would take a long time one by one.
Going forward, I will likely also conformally coat the USB port and Battery Port (Battery and USB VIN come from the host PCB via header pins so really don’t need these). I’m thinking I would load the device OS and Firmware via SWD instead of USB and then once done, I could put a tiny amount of hot glue over the SWD pins to keep those available. If I ever need them again, I should be able to pull the hot glue right off.
I’m waiting a full 2 days for full cure time before testing the Reset and Mode buttons. It says it cures to a durable, flexible and smooth finish. So I think they would still function but time will tell.
Won’t really know how successful this is until a few years but I’ll have more confidence with devices being as robust as possible in the field this way.
If you have any other tips/tricks let me know.


