I fairly recently got hold of a couple of Photons and began my journey into microcontrollers. After a handful of very, very simple breadboard setups, this is my first attempt at making an actual “thing”. I wanted to share with the community my progress so far, things I’ve learned along the way, and welcome any feedback or suggestions.
The concept for Clockwork is based loosely on an Instructable I saw called “Wood Block LED Clock”. My wife was talking recently about wanting something like this, and so I figured I’d try and build one as a gift for our upcoming wedding anniversary.
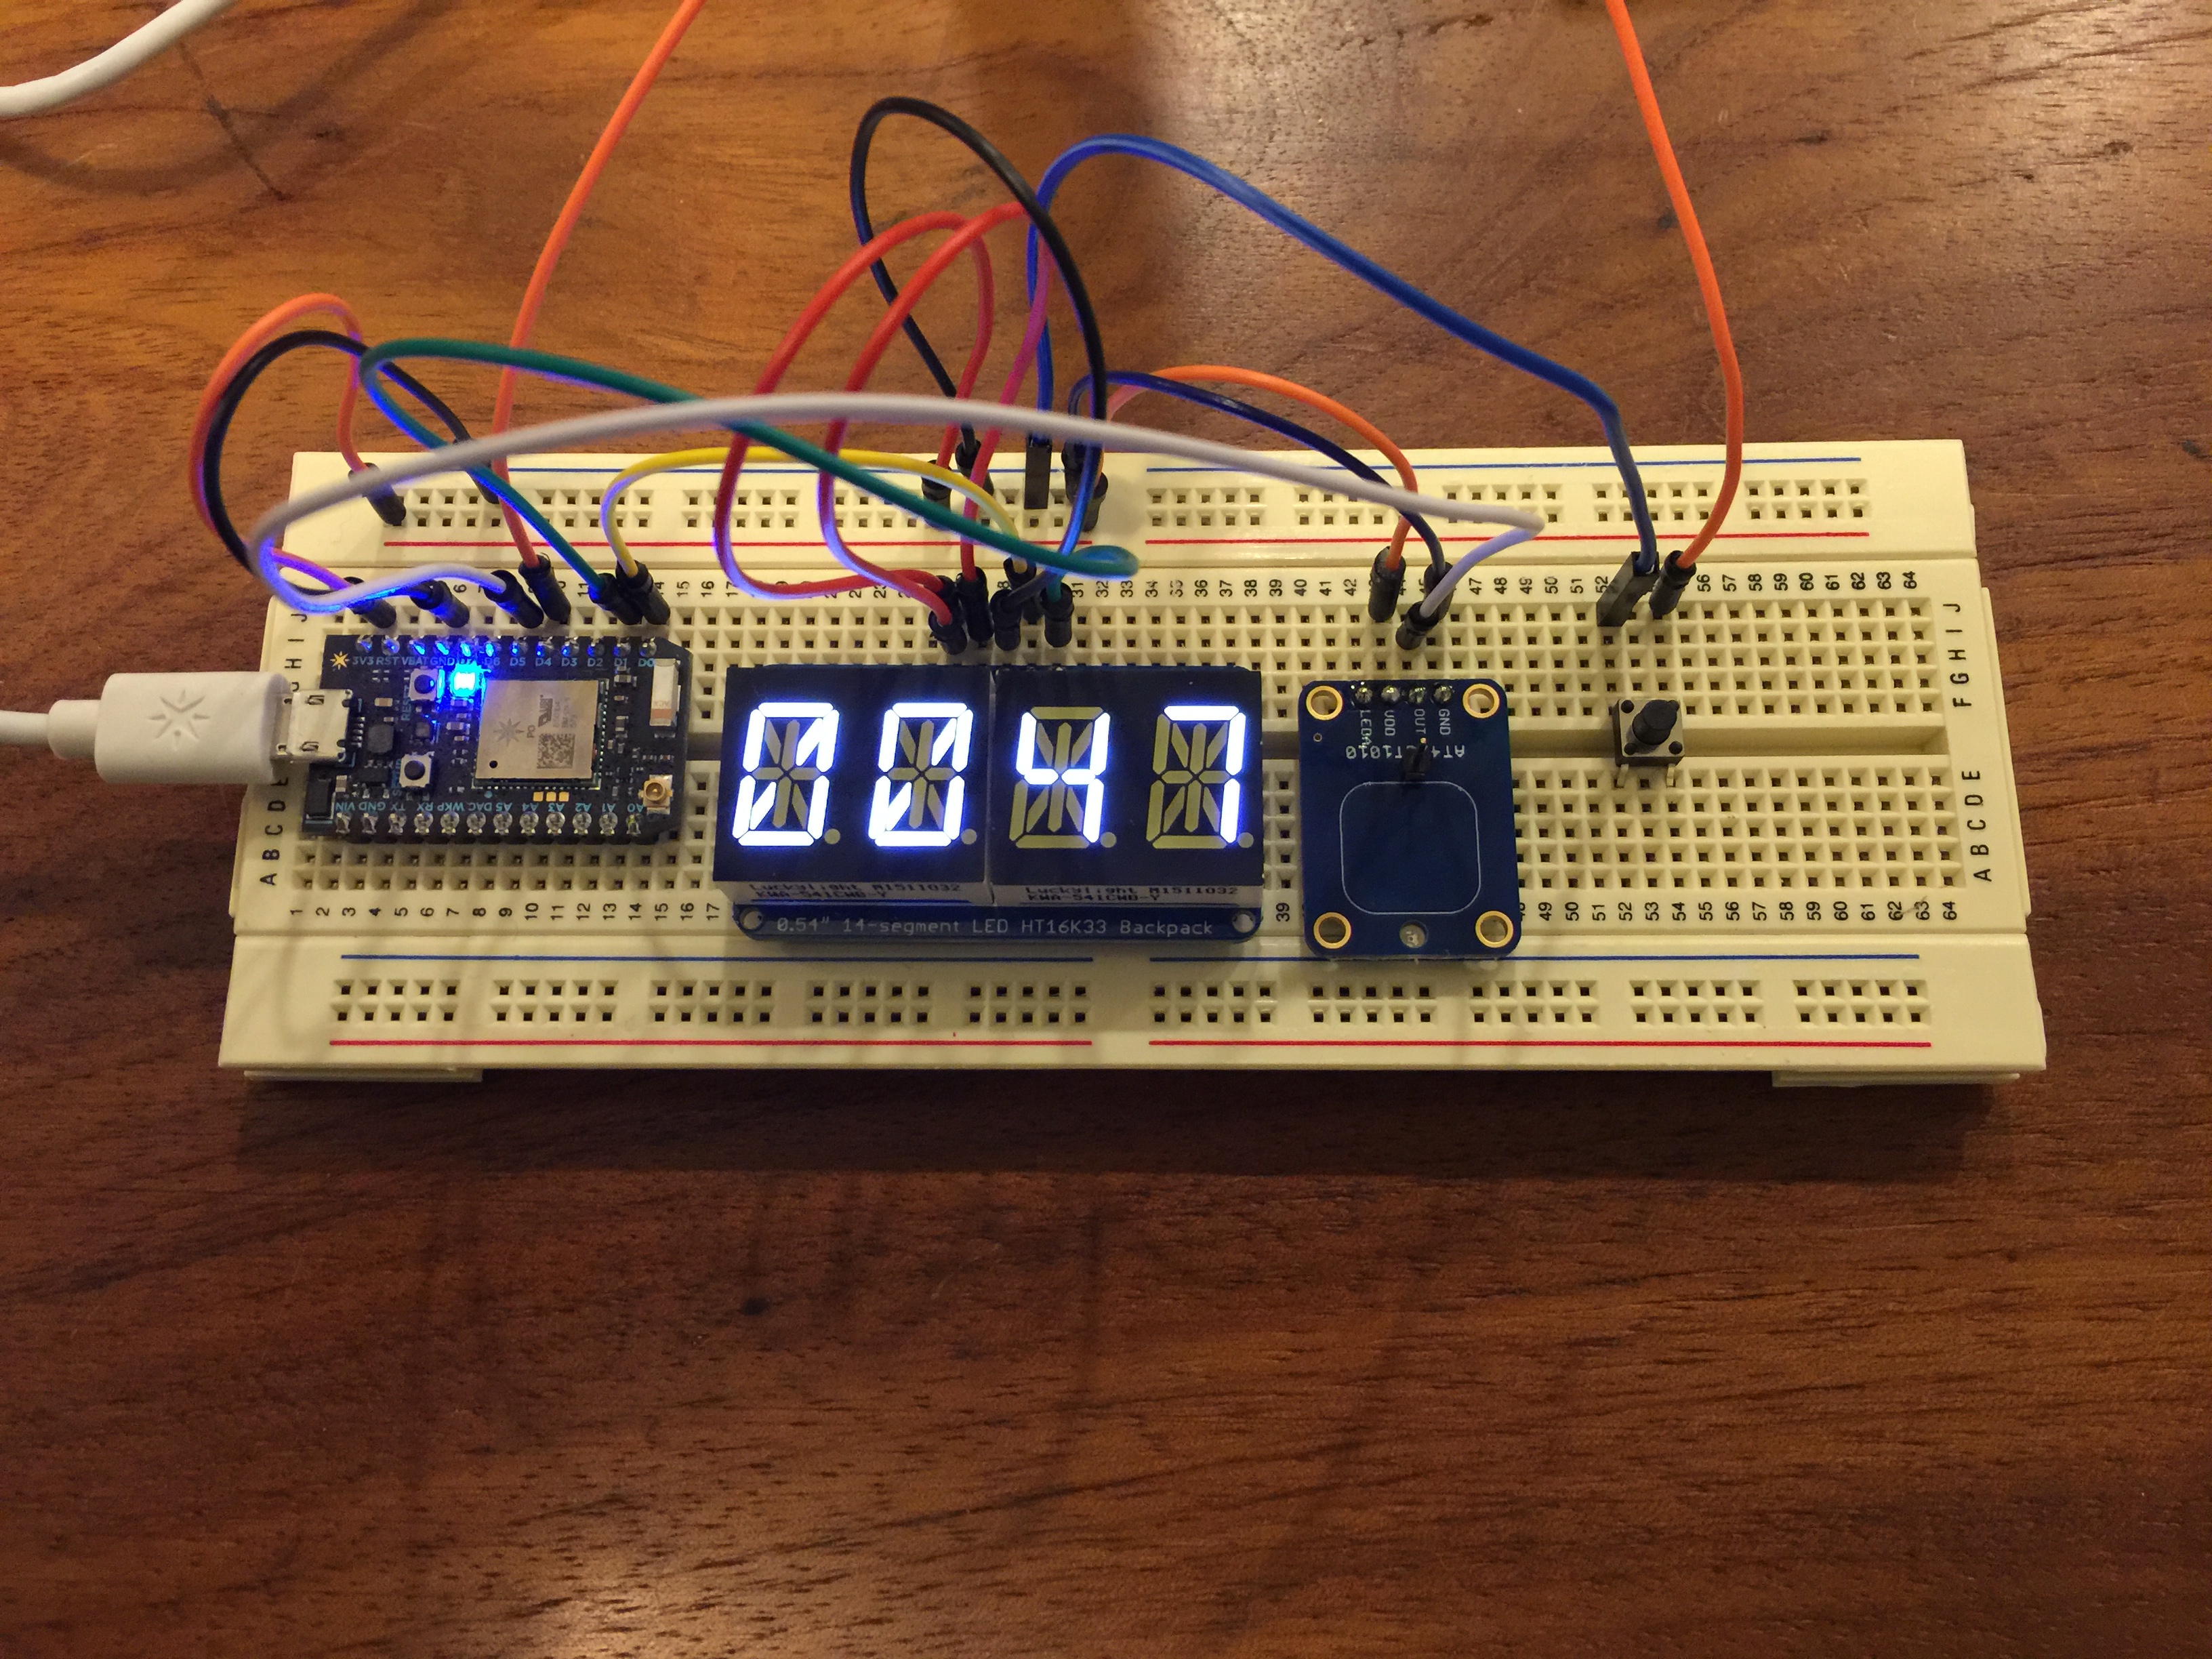
I’m not using a kit, just a Photon and a handful of other parts. It’s a fairly simple device, so it feels achievable to build.
Functionality
The clock has 4 display modes:
- Clock - 24hr, synchronised with my timezone, periodically updated from Particle Cloud to ensure accuracy
- Temperature - Celsius, show outside temperature for my location, as obtained from BOM and provided by Node.js app.
- Blank - Basically a sleep mode, switches to this 30 seconds after the last interaction, until another interaction occurs.
- Scrolling message - This mode isn’t in the normal rotation, and will appear whenever a message is sent from the Node.js app. Scrolls through 3 times.
There are 2 buttons:
- Brightness - The capacitive touch sensor cycles through several brightness steps. Moving to the next one on each press, and looping back around to start again from 0 when the maximum is reached.
- Display mode - Mini pushbutton cycles through the display modes on each press, except for the 4th one.
Hardware
Tools
- Breadboard
- Soldering iron
Parts (implemented)
- Particle Photon
- Jumper wires
- Quad Alphanumeric Display - White 0.54" Digits w/ I2C Backpack
- Standalone Momentary Capacitive Touch Sensor Breakout - AT42QT1010
- Mini pushbutton
- Copper Foil Tape wth Conductive Adhesive - 25mm x 15 meter roll
- Headers
- USB Micro B cable
Parts (coming soon)
- Standalone Momentary Capacitive Touch Sensor Breakout - AT42QT1010 (to replace the mini pushbutton)
- SparkFun Photon Battery Shield
- Polymer Lithium Ion Battery - 6Ah
- SparkFun Photon ProtoShield
Software
- Clockwork (code that runs on the Photon)
- Clockwork Brain (code that runs on a server somewhere)
Enclosure
I’m currently working on a plan for this using SketchUp. It’ll be very similar to the design from the Instructable linked above.
The basic plan is:
- Have the LED display shine through the veneer on the front face.
- Have the USB port accessible from the back face.
- Have a layer of copper foil tape, connected to the capacitive touch sensors, beneath the side faces.
- Be able to open the enclosure to access / remove the internals fairly easily, while attempting to maintain a streamlined appearance of it just being a wooden block when the display is off (just a little port on the back the only clue).
I think the hardest part here will be to provide support to all the components to ensure they’re in the correct positions within the cavity.
Power
As far as powering the device goes, I’m hoping that with the Sparkfun battery shield and the 6Ah LiPo I’ll be able to either have the device permanently plugged into a USB power supply, or unplugged for a decent amount of time. I’m really not certain about this though, mainly in terms of whether that’s a possible and / or sensible thing for the health of the battery. Also, I have no real concept of how long that battery would last with normal use of the device!
