I had a chance to play around with the Bluetooth API over the past two days. Seems solid!! My hat is tipped to @ielec and team for an awesome feature add. 
I ended up creating a way to update the RGB LED from an app like Light Blue Exploerer. Plus, as extra credit, got it to push the state over the local mesh network.
This tutorial is a cross post from my blog. I warn you it is lengthy. On the plus side it has every detail that I could think of to make it useful. You can just skip the parts that you already know/understand. 
Here we go.
Stage 1: Setting Up Bluetooth
Write the Code
We want to set up a service with 3 characteristics. The characteristics relate to the intensity of the RGB LEDs respectively. Here’s how to get your Bluetooth Set Up:
-
In your
Setup()function enable app control of your LEDRGB.control(true); -
Set up your UUIDs at the top of your
.inofileconst char* serviceUuid = "6E400001-B5A3-F393-E0A9-E50E24DCCA9E"; const char* red = "6E400002-B5A3-F393-E0A9-E50E24DCCA9E"; const char* green = "6E400003-B5A3-F393-E0A9-E50E24DCCA9E"; const char* blue = "6E400004-B5A3-F393-E0A9-E50E24DCCA9E";UUIDs are unique identifiers or addresses. They’re used to differentiate different services and characteristics on a device.
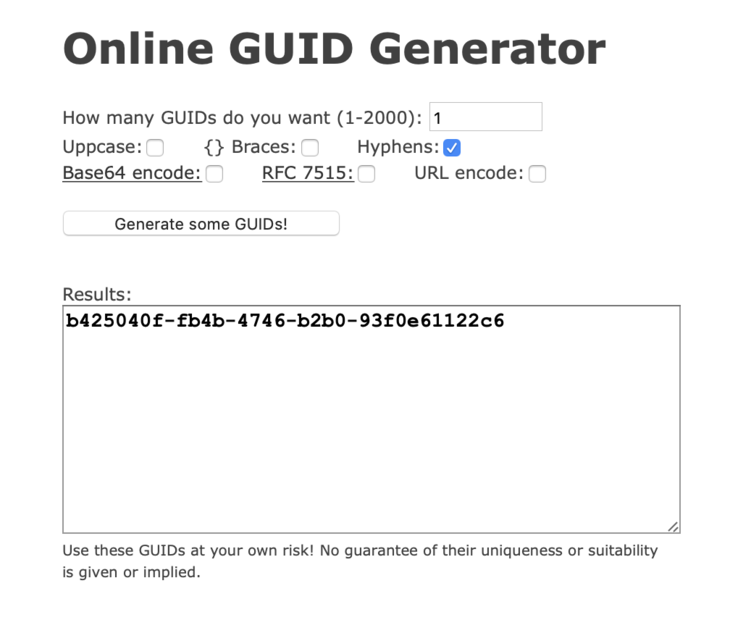
The above UUIDs are used in previous Particle examples. If you want to create your own you can use
uuidgenon the OSX command line. You can also go to a website like Online GUID Generator.Use the above settings to get your own UUID. You can then create your service and characteristic UUIDS from this generated one:
const char* serviceUuid = "b425040**0**-fb4b-4746-b2b0-93f0e61122c6"; //service const char* red = "b4250401-fb4b-4746-b2b0-93f0e61122c6"; //red char const char* green = "b4250402-fb4b-4746-b2b0-93f0e61122c6"; //green char const char* blue = "b4250403-fb4b-4746-b2b0-93f0e61122c6"; //blue charThere’s no right or wrong way to do this. But you have to be careful you’re not using the UUIDs reserved by the Bluetooth SIG. This is highly unlikely. If you do want to double check you can go here and here.
For now, we’ll stick with the first set of UUIDs.
-
In
Setup(), initialize your service.// Set the RGB BLE service BleUuid rgbService(serviceUuid);This is the first step of "registering’ your service. More on this below.
-
Initialize each characteristic in
Setup()BleCharacteristic redCharacteristic("red", BleCharacteristicProperty::WRITE_WO_RSP, red, serviceUuid, onDataReceived, (void*)red); BleCharacteristic greenCharacteristic("green", BleCharacteristicProperty::WRITE_WO_RSP, green, serviceUuid, onDataReceived, (void*)green); BleCharacteristic blueCharacteristic("blue", BleCharacteristicProperty::WRITE_WO_RSP, blue, serviceUuid, onDataReceived, (void*)blue);For this setup, we’re going to use the
WRITE_WO_RSPproperty. This allows us to write the data and expect no response.
I’ve referenced the UUIDs as the next two parameters. The first being the characteristic UUID. The second being the service UUID.The next parameter is the callback function. When data is written to this callback, this function will fire.
Finally the last parameter is the context. What does this mean exactly? We’re using the same callback for all three characteristics. The only way we can know which characteristic was written to (in deviceOS at least) is by setting a context. In this case we’re going to use the already available UUIDs.
-
Right after defining the characteristics, let’s add them so they show up:
// Add the characteristics BLE.addCharacteristic(redCharacteristic); BLE.addCharacteristic(greenCharacteristic); BLE.addCharacteristic(blueCharacteristic); -
Set up the callback function.
// Static function for handling Bluetooth Low Energy callbacks static void onDataReceived(const uint8_t* data, size_t len, const BlePeerDevice& peer, void* context) { }You can do this at the top of the file (above
Setup()) We will define this more later. -
Finally, in order for your device to be connectable, we have to set up advertising. Place this code at the end of your
Setup()function// Advertising data BleAdvertisingData advData; // Add the RGB LED service advData.appendServiceUUID(rgbService); // Start advertising! BLE.advertise(&advData);First we create a
BleAdvertisingDataobject. We add thergbServicefrom Step 3. Finally, we can start advertising so our service and characteristics are discoverable!
Time to test
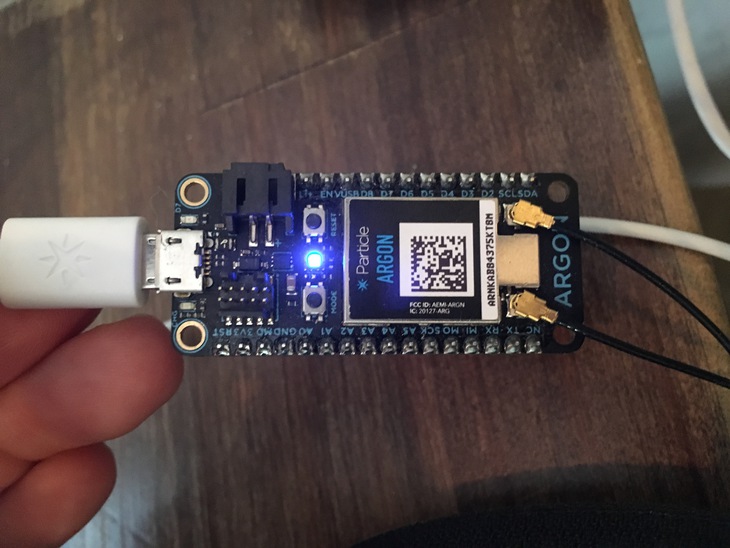
At this point we have a minimally viable program. Let’s compile it and program it to our Particle hardware. This should work with any Mesh enabled device. (Xenon, Argon, Boron)
-
Before we start testing, temporarily add
SYSTEM_MODE(MANUAL);to the top of your file. This will prevent the device connecting to the mesh network. If the device is blinking blue on startup, you’ll have to set it up with the Particle App before continuing. -
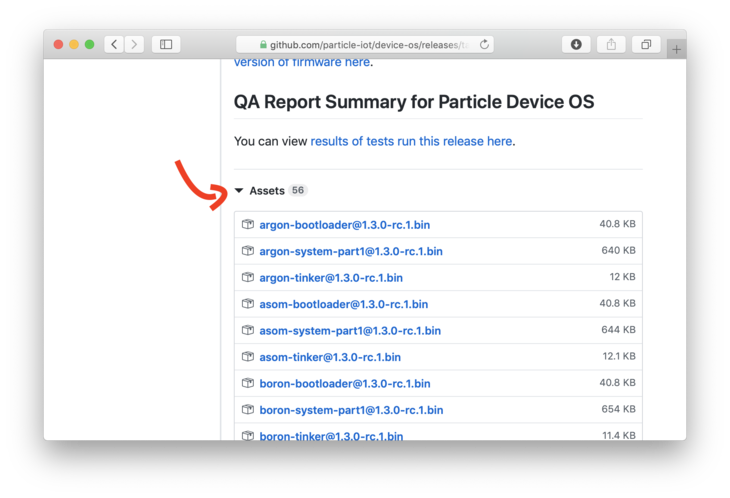
Download the 1.3.0-rc.1 image here. For Xenon, you’ll need xenon-system-part1@1.3.0-rc.1.bin. For others look for boron-system-part1@1.3.0-rc.1.bin and argon-system-part1@1.3.0-rc.1.bin. The files are at the bottom of the page under Assets
-
Put your device into DFU mode. Hold the Mode Button and momentarily click the Reset Button. Continue holding the Mode Button until the LED blinks yellow.
-
In a command line window, change directories to where you stored the file you downloaded. In my case the command is
cd ~/Downloads/ -
Then run:
particle flash --usb xenon-system-part1@1.3.0-rc.1.binThis will install the latest OS to your Xenon. Once it’s done it will continue to rapidly blink yellow. Again if you have a different Particle Mesh device, change the filename to match.
-
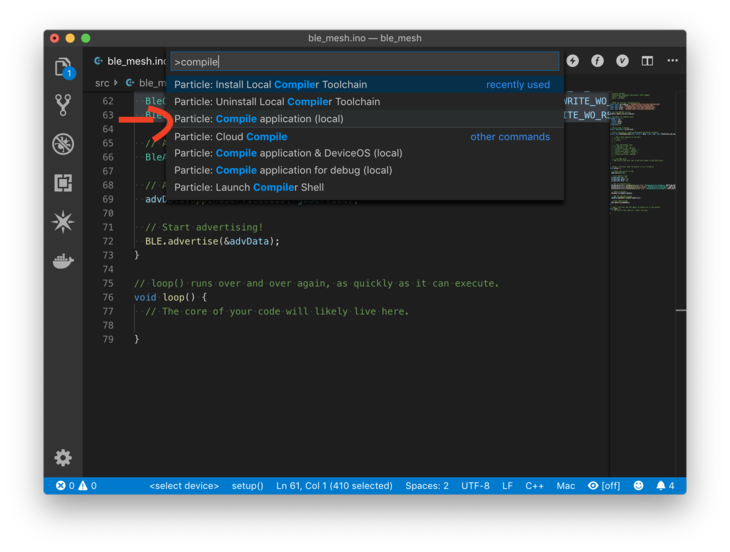
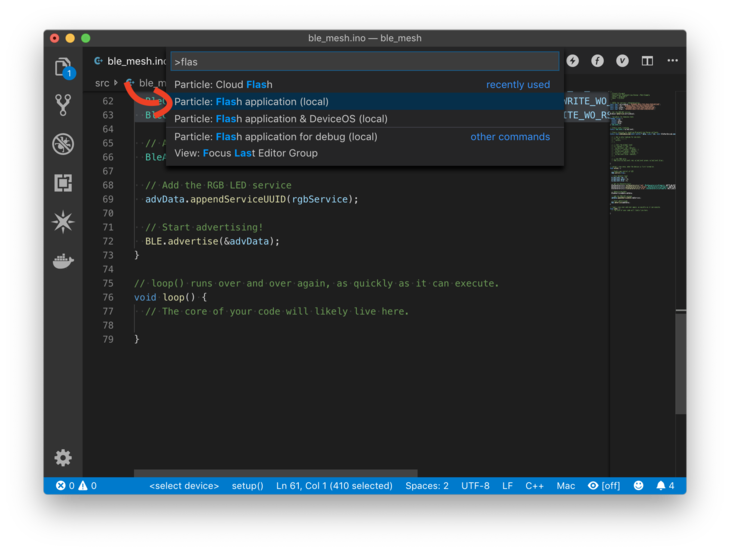
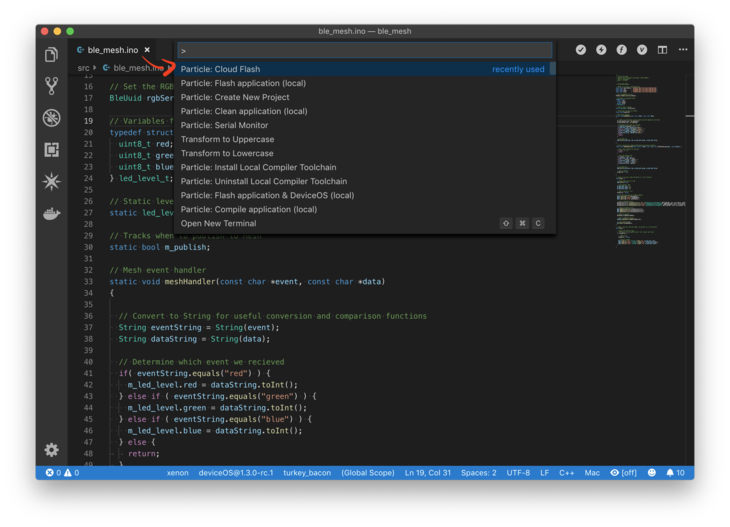
In Visual Code, use the Command + Shift + P key combination to pop up the command menu. Select Particle: Compile application (local)
-
Fix any errors that may pop up.
-
Then, open the same menu and select Flash application (local)
-
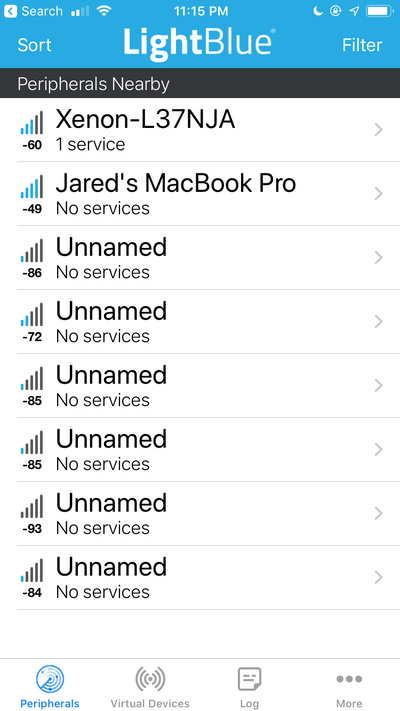
When programming is complete, pull out your phone. Then, open your favorite Bluetooth Low Energy app. The best ones are NRF Connect and Light Blue Explorer. I’m going to use Light Blue Explorer for this example.
-
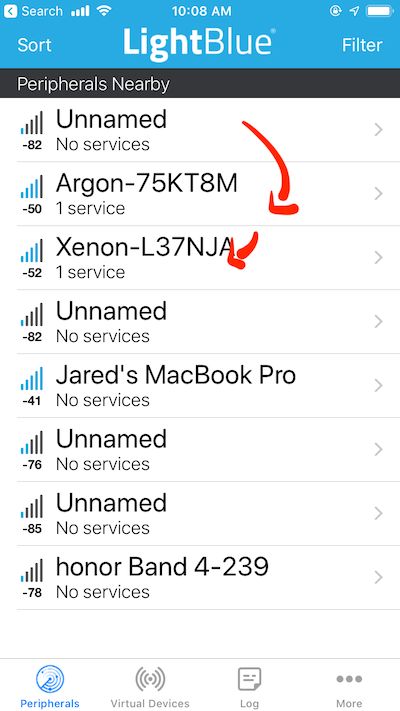
Check if a device named “Xenon-” is advertising. Insert with the unique ID for your device.
-
Find your device and click the name.
-
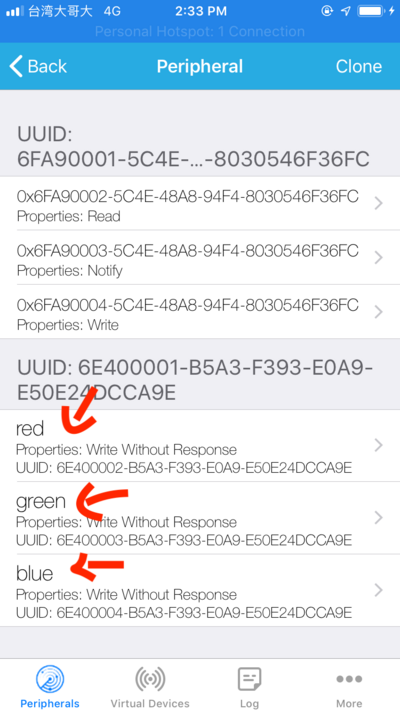
Look at the list of services & characteristics. Does it include the service and characteristic UUID’s that we have set so far? For instance, does the service UUID show up as 6E400001-B5A3-F393-E0A9-E50E24DCCA9E?
If everything shows up as you expect, you’re in a good place. If not go through the earlier instructions to make sure everything matches.
Stage 2: Handling Data
The next stage of our project is to process write events. We’ll be updating our onDataReceived function.
Write the Code
-
First, let’s create a struct that will keep the state of the LEDs. This can be done at the top of the file.
// Variables for keeping state typedef struct { uint8_t red; uint8_t green; uint8_t blue; } led_level_t; -
The second half of that is to create a static variable using this data type
// Static level tracking static led_level_t m_led_level;The first two steps allows us to use one single variable to represent the three values of the RGB LED.
-
Next, let’s check for basic errors inside the
onDataReceivefunction For instance we want to make sure that we’re receiving only one byte.// We're only looking for one byte if( len != 1 ) { return; } -
Next, we want to see which characteristic this event came from. We can use the
contextvariable to determine this.// Sets the global level if( context == red ) { m_led_level.red = data[0]; } else if ( context == green ) { m_led_level.green = data[0]; } else if ( context == blue ) { m_led_level.blue = data[0]; }Remember, in this case context will be equal to the pointer of either the red, green, or blue UUID string. You can also notice we’re setting
m_led_level. That way we can update the RGB led even if only one value has changed. -
Finally, once set, you can write to the
RGBobject// Set RGB color RGB.color(m_led_level.red, m_led_level.green, m_led_level.blue);
Test the Code
Let’s go through the same procedure as before to flash the device.
-
Put your device into DFU mode. Hold the Mode Button and click the Reset Button. Continue holding the Mode Button until the LED blinks yellow.
-
Then, open the same menu and select Flash application (local)
-
Once it’s done programming, connect to the device using Light Blue Explorer.
-
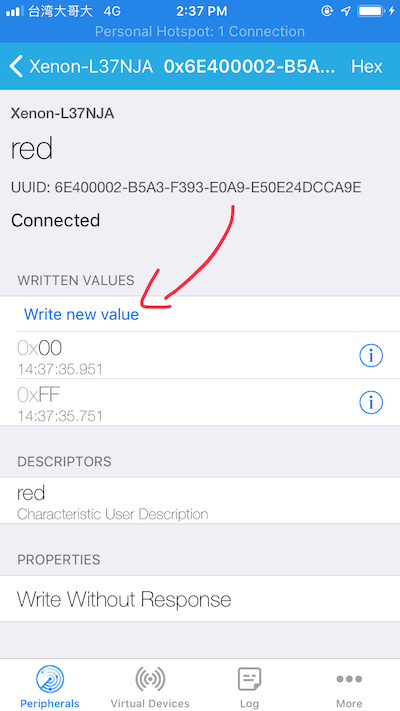
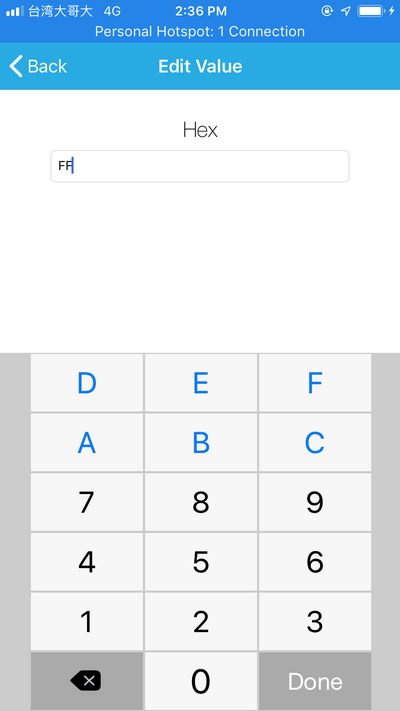
Tap on the characteristic that applies to the red LED.
-
Write FF. The red LED should turn on.
-
Write 00. The red LED should turn off.
-
Do the same for the other two characteristics. We now have full control of the RGB LED over Bluetooth Low Energy!
Stage 3: Sharing Via Mesh
Finally, now that we’re successfully receiving BLE message, it’s time to forward them on to our mesh network.
Write the Code
-
First let’s remove MANUAL mode. Comment out
SYSTEM_MODE(MANUAL); -
At the top of the file let’s add a variable we’ll used to track if we need to publish
// Tracks when to publish to Mesh static bool m_publish; -
Then initialize it in
Setup()// Set to false at first m_publish = false; -
Then, after setting the RGB led in the
onDataReceivedcallback, let’s set it true:// Set RGB color RGB.color(m_led_level.red, m_led_level.green, m_led_level.blue); // Set to publish m_publish = true; -
Let’s add a conditional in the
loop()function. This will cause us to publish the LED status to the Mesh network:if( m_publish ) { // Reset flag m_publish = false; // Publish to Mesh Mesh.publish("red", String::format("%d", m_led_level.red)); Mesh.publish("green", String::format("%d", m_led_level.green)); Mesh.publish("blue", String::format("%d", m_led_level.blue)); }Mesh.publishrequires a string for both inputs. Thus, we’re usingString::formatto create a string with our red, green and blue values. -
Then let’s subscribe to the same variables in
Setup(). That way another device can cause the LED on this device to update as well.Mesh.subscribe("red", meshHandler); Mesh.subscribe("green", meshHandler); Mesh.subscribe("blue", meshHandler); -
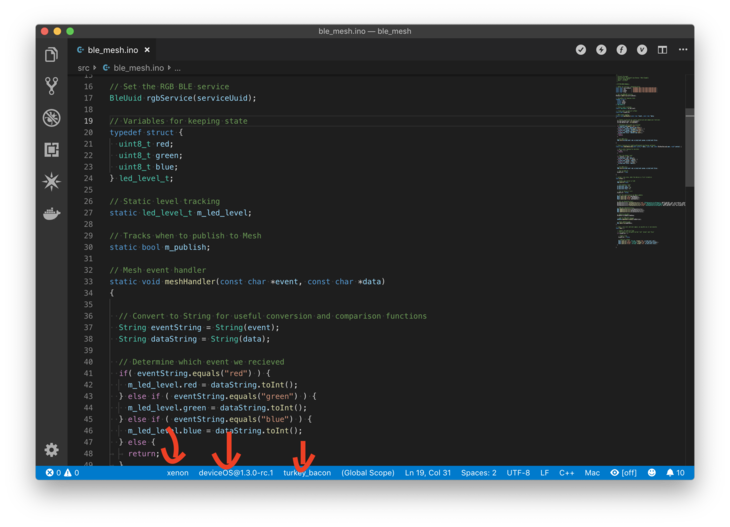
Toward the top of the file we want to create
meshHandler// Mesh event handler static void meshHandler(const char *event, const char *data) { } -
In this application, we need the
eventparameter anddataparameter. In order use them, we have to change them to aStringtype. That way we can use the built in conversion and comparison functions. So, inside themeshHandlerfunction add:// Convert to String for useful conversion and comparison functions String eventString = String(event); String dataString = String(data); -
Finally we do some comparisons. We first check if the event name matches. Then we set the value of the
dataStringto the corresponding led level.// Determine which event we recieved if( eventString.equals("red") ) { m_led_level.red = dataString.toInt(); } else if ( eventString.equals("green") ) { m_led_level.green = dataString.toInt(); } else if ( eventString.equals("blue") ) { m_led_level.blue = dataString.toInt(); } else { return; } // Set RGB color RGB.color(m_led_level.red, m_led_level.green, m_led_level.blue);Then at the end we set the new RGB color. Notice how I handle an unknown state by adding a
returnstatement in theelsesection. It’s always good to filter out error conditions before they wreak havoc!
Test the Code
-
Open the Particle App on your phone
-
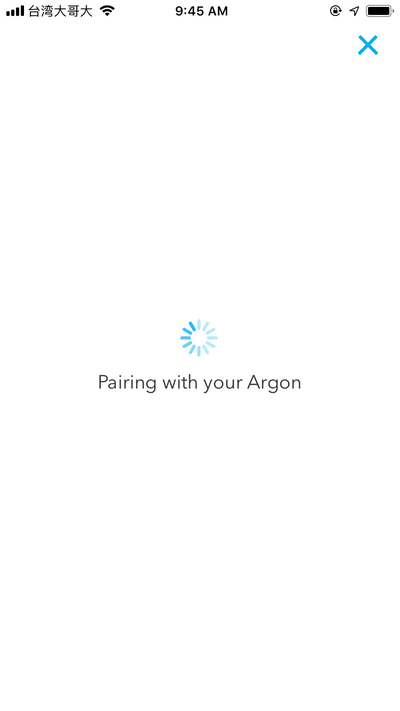
Let’s set up the Argon first. If it’s not blinking blue, hold the mode button until it’s blinking blue.
Note: if you’ve already programmed the app, the LED will be off by default. Hold the mode button for 5 seconds and then continue.
-
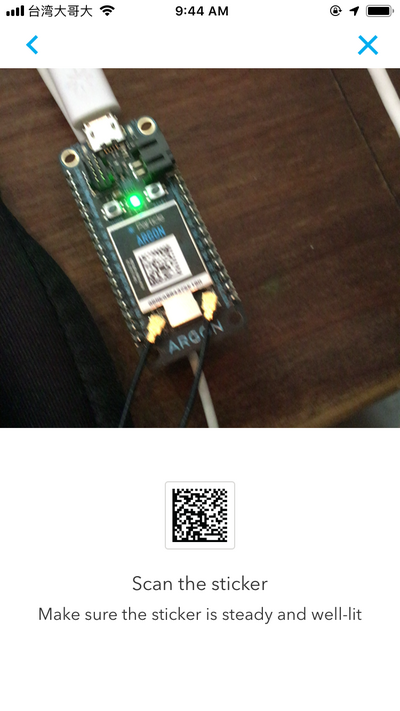
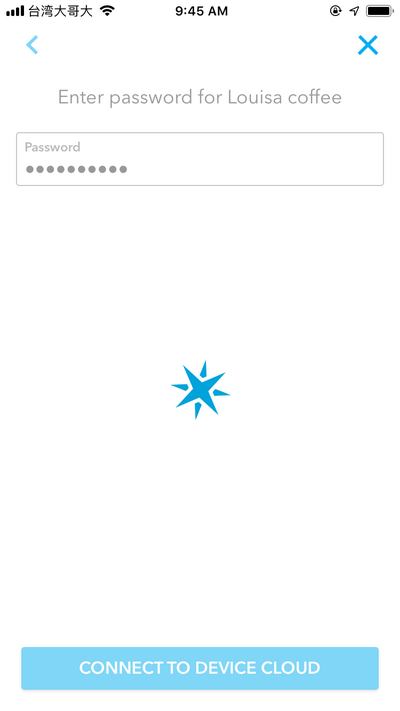
Go through the pairing process. The app walks you though all the steps. Make sure you remember the Admin password for your mesh network.
-
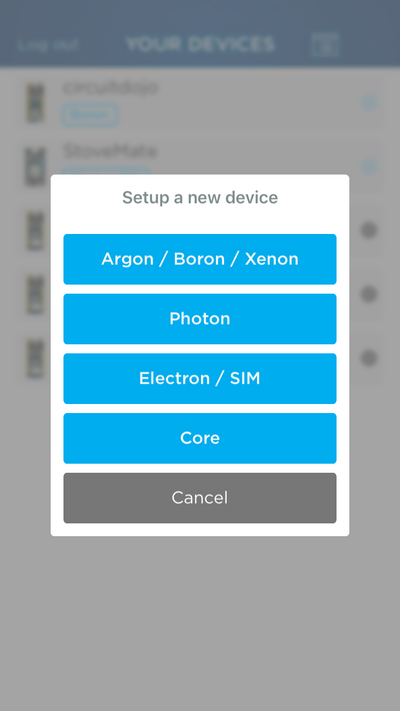
Program an Argon with the latest firmware (1.3.0) (see Stage 1 - Time to Test - Step 2 for a reminder on how to do this)
-
Once rapidly blinking yellow, program the Argon with the Tinker app. You can download it at the release page.
-
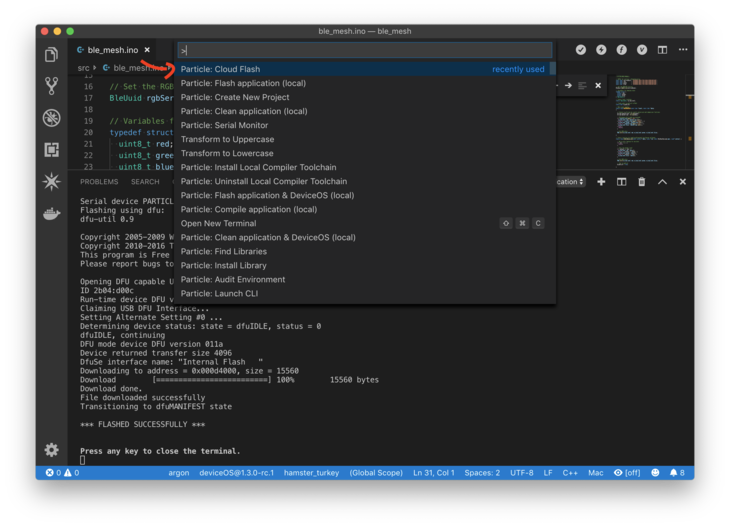
Once we have a nice solid Cyan LED (connected to the Particle Cloud) we’ll program the app. Use the Cloud Flash option in the drop down menu.
As far as I can tell, Particle forces any device flashed locally into safe mode when connecting to the cloud. It may be my setup. Your mileage may vary here. Best to use Cloud Flash.
Make sure you select the correct deviceOS version (1.3.0-rc1), device type (Argon) and device name (What you named it during setup)
-
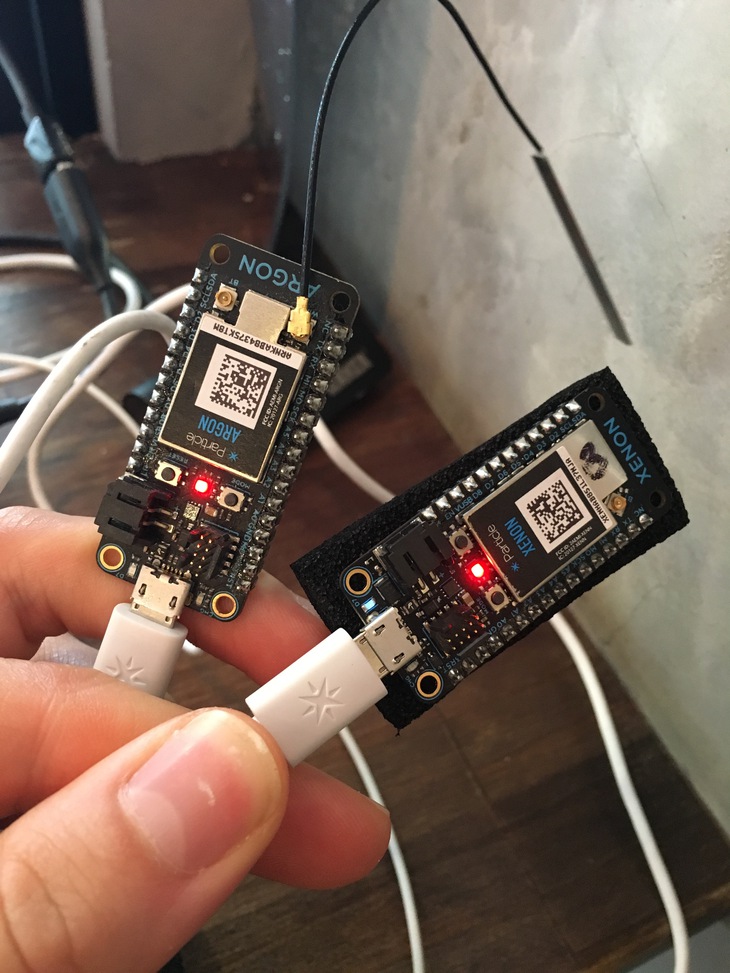
Connect to the Xenon using the phone app
-
Connect the Xenon to your Mesh network using the phone app
-
Flash your Xenon using Cloud Flash. Use the name that you gave it during the phone app setup. As long as the device is connected to Particle Cloud or in safe mode (Purple LED), it should program.
-
Once connected, let’s get to the fun part. Open up Light Blue Explorer. Connect to either the Argon or the Xenon.
-
Select one of the LED characteristics and change the value.
The LED should change on all devices!
Final Code
Here’s the final code with all the pieces put together. You can use this to make sure you put them in the right place!!
/*
* Project ble_mesh
* Description: Bluetooth Low Energy + Mesh Example
* Author: Jared Wolff
* Date: 7/13/2019
*/
//SYSTEM_MODE(MANUAL);
// UUIDs for service + characteristics
 const char* serviceUuid = "6E400001-B5A3-F393-E0A9-E50E24DCCA9E";
 const char* red         = "6E400002-B5A3-F393-E0A9-E50E24DCCA9E";
 const char* green       = "6E400003-B5A3-F393-E0A9-E50E24DCCA9E";
 const char* blue        = "6E400004-B5A3-F393-E0A9-E50E24DCCA9E";
 // Set the RGB BLE service
 BleUuid rgbService(serviceUuid);
// Variables for keeping state
typedef struct {
uint8_t red;
uint8_t green;
uint8_t blue;
} led_level_t;
// Static level tracking
static led_level_t m_led_level;
// Tracks when to publish to Mesh
static bool m_publish;
// Mesh event handler
static void meshHandler(const char *event, const char *data)
{
// Convert to String for useful conversion and comparison functions
String eventString = String(event);
String dataString = String(data);
// Determine which event we recieved
if( eventString.equals("red") ) {
m_led_level.red = dataString.toInt();
} else if ( eventString.equals("green") ) {
m_led_level.green = dataString.toInt();
} else if ( eventString.equals("blue") ) {
m_led_level.blue = dataString.toInt();
} else {
return;
}
// Set RGB color
RGB.color(m_led_level.red, m_led_level.green, m_led_level.blue);
}
// Static function for handling Bluetooth Low Energy callbacks
static void onDataReceived(const uint8_t* data, size_t len, const BlePeerDevice& peer, void* context) {
// We're only looking for one byte
if( len != 1 ) {
return;
}
// Sets the global level
if( context == red ) {
m_led_level.red = data[0];
} else if ( context == green ) {
m_led_level.green = data[0];
} else if ( context == blue ) {
m_led_level.blue = data[0];
}
// Set RGB color
RGB.color(m_led_level.red, m_led_level.green, m_led_level.blue);
// Set to publish
m_publish = true;
}
// setup() runs once, when the device is first turned on.
void setup() {
// Enable app control of LED
RGB.control(true);
// Init default level
m_led_level.red = 0;
m_led_level.green = 0;
m_led_level.blue = 0;
// Set to false at first
m_publish = false;
// Set the subscription for Mesh updates
Mesh.subscribe("red",meshHandler);
Mesh.subscribe("green",meshHandler);
Mesh.subscribe("blue",meshHandler);
// Set up characteristics
 BleCharacteristic redCharacteristic("red", BleCharacteristicProperty::WRITE_WO_RSP, red, serviceUuid, onDataReceived, (void*)red);
 BleCharacteristic greenCharacteristic("green", BleCharacteristicProperty::WRITE_WO_RSP, green, serviceUuid, onDataReceived, (void*)green);
 BleCharacteristic blueCharacteristic("blue", BleCharacteristicProperty::WRITE_WO_RSP, blue, serviceUuid, onDataReceived, (void*)blue);
 // Add the characteristics
 BLE.addCharacteristic(redCharacteristic);
 BLE.addCharacteristic(greenCharacteristic);
 BLE.addCharacteristic(blueCharacteristic);
 // Advertising data
 BleAdvertisingData advData;

 // Add the RGB LED service
 advData.appendServiceUUID(rgbService);

 // Start advertising!
 BLE.advertise(&advData);
}
// loop() runs over and over again, as quickly as it can execute.
void loop() {
// Checks the publish flag,
// Publishes to a variable called "red" "green" and "blue"
 if( m_publish ) {
 	// Reset flag
 	m_publish = false;

 	// Publish to Mesh
   Mesh.publish("red", String::format("%d", m_led_level.red));
   Mesh.publish("green", String::format("%d", m_led_level.green));
   Mesh.publish("blue", String::format("%d", m_led_level.blue));
 }
}
Further Thoughts
In comparison, this would take a significantly longer amount of time using the Nordic SDK. Yes, it gives you more options, but at the cost of time and errors! All of this was originally posted on my blog. I’m loving playing around with my Particle Mesh boards so there will be more where this comes from for sure!
Also, any and all feedback is appreciated. I want these tutorials to be as useful for you guys as possible.